

Perfect Pie Crust
I grew up with plenty of dessert pies, quiches, chicken pot pies, and savory galettes. Regardless of what fabulous ingredients were tucked neatly inside, my Mother’s pie crust was always perfectly light and flaky. The recipe below comes from generations of pie making experience. I’ve done my best to capture all the subtle nuances, just as I was taught. I’m not sure if my Mom developed this recipe on her own, or it was my Grandmother’s family recipe. What I can tell you is that it was written on a 3×5 index card that seems to have fallen victim to decades of butter saturated fingers. Enjoy! 🙂
Mom’s Go-To Perfect Pie Crust
Makes enough dough for two 9-inch pie crusts. You can freeze any unused dough for up to 2-months.
Ingredients
2 cups flour, sifted (extra for rolling surface)
1 teaspoon salt
12 tablespoons sweet unsalted butter, well chilled & cut into pieces
2 tablespoon sugar (*for sweet pies only such as an apple galette)
2 large egg, beaten
Preparations
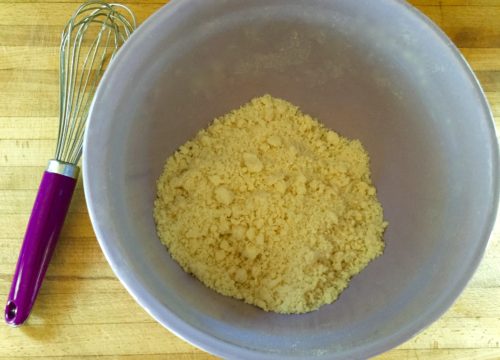
Cut butter into small pieces and place into freezer for at least 15-minutes to sufficiently chill. Add butter to large bowl with sugar, flour and salt. Using your fingers, quickly hand blend the ingredients together with a pinching motion. Blend ingredients into a course meal, creating little chunks about the size of a grain of rice. Using a measuring cup and an electric mixer, beat eggs for 30 – 40 seconds. Drizzle beaten egg over mixture, mixing with a fork just until dough comes together.

Shape dough into a ball, cover in plastic wrap, and place in the refrigerator for at least 60-minutes to chill.
When rolling the crust, speed is the key so it doesn’t heat up, which will create a dense, dry crust that might better be used as a self-defense weapon. On a lightly floured surface, roll out dough to a 12-inch circle, approx. 1/8 of an inch thick.
Using the rolling pin, gently pick up and roll the crust into your chilled pie plate. Using your fingers, shape the crust into the corners and create a pretty edging around the top.
My Mom liked to use a fork, but I prefer to make little, wave-like shapes with my fingers. Leave about ½ inch of extra dough around the top to account for shrinkage. Using a fork, poke holes throughout the crust to allow for air to escape. This prevents the dreaded ‘pie bubbles’ from getting overly-expressive with the surface of your crust.
Place pie crust back into refrigerator for at least 30-minutes to chill prior to cooking.
Bake in a pre-heated oven at 350 degrees until just golden brown. Cooking time will vary depending upon your oven, however I usually find 25 – 30 minutes or so will due.


